VM Provisioning
Warning
This section is for participants from academic institutes to use the self-service portal. Please contact support@naic.no to get a virtual machine if you do not have access as described below.
Objectives
Create MyAccessID using Feide account
Provision a short lived VM on NAIC Orchestrator
MyAccessID
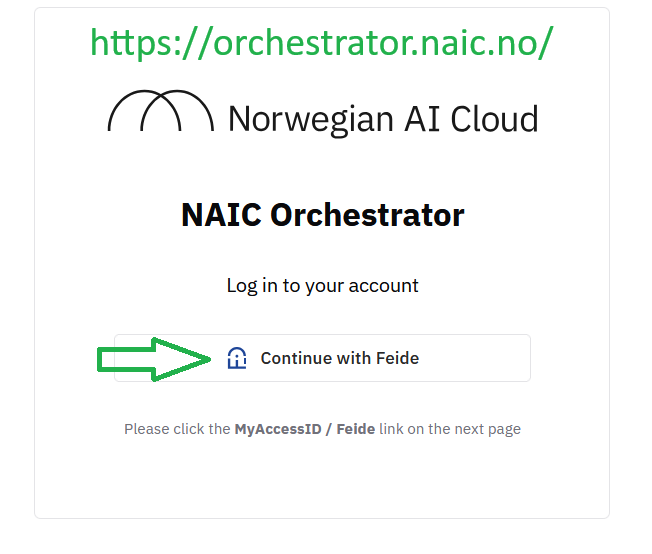
To access orchestrator.naic.no we need to use MyAccessID via Feide as of now. Anyone affiliated to institutes in the list below would have access, but you might have to register your Feide account with MyAccessID first.
Warning
If you do not find your institute, this means that your institute is not registered with MyAccessID and your Feide account would not work with NAIC orchestrator. Please contact your institutes admin to get your institute registered. If this is not possible and you want to follow the course, please contact “support@naic.no” to get a VM, we might be able to assist depending on capacity.
Details on registering with MyAccessID: https://puhuri.neic.no/user_guides/myaccessid_registration/
Create a VM using NAIC Orchestrator
Please make sure your MyAccessID is active before this step.
Step 1: Login to https://orchestrator.naic.no/
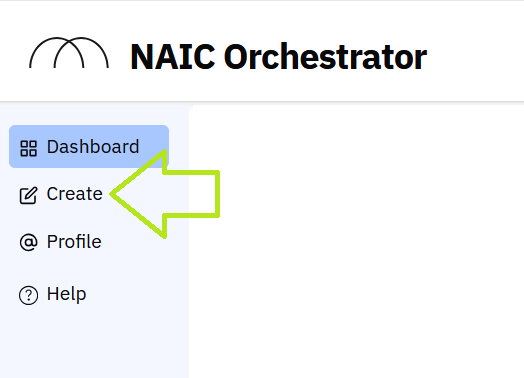
Step 2: Navigate to create
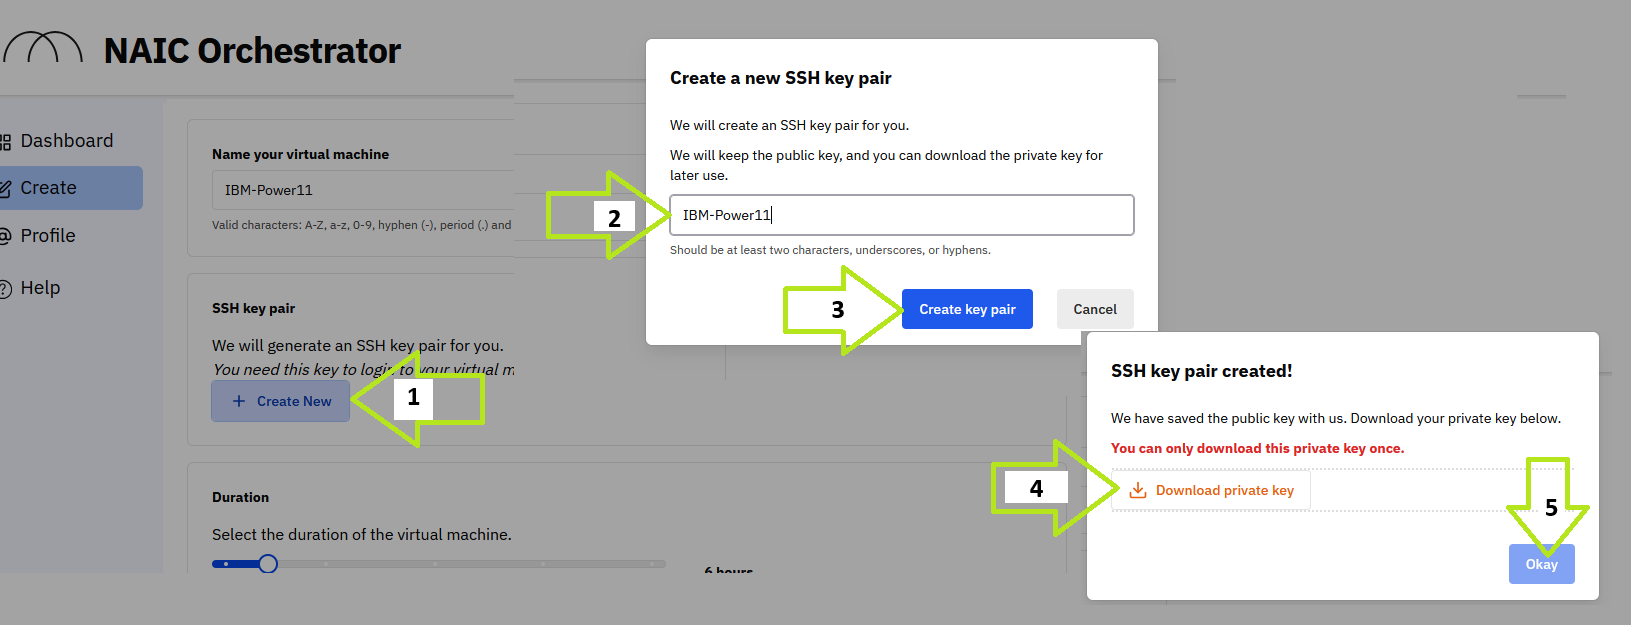
Step 3: Naming the VM and create a key file and download it
Provide simple name, with only alphabetical characters and without spaces
Give a name for the key and download it to your local computer. Orchestrator would not store this key, so if you lose it then you would lose access.
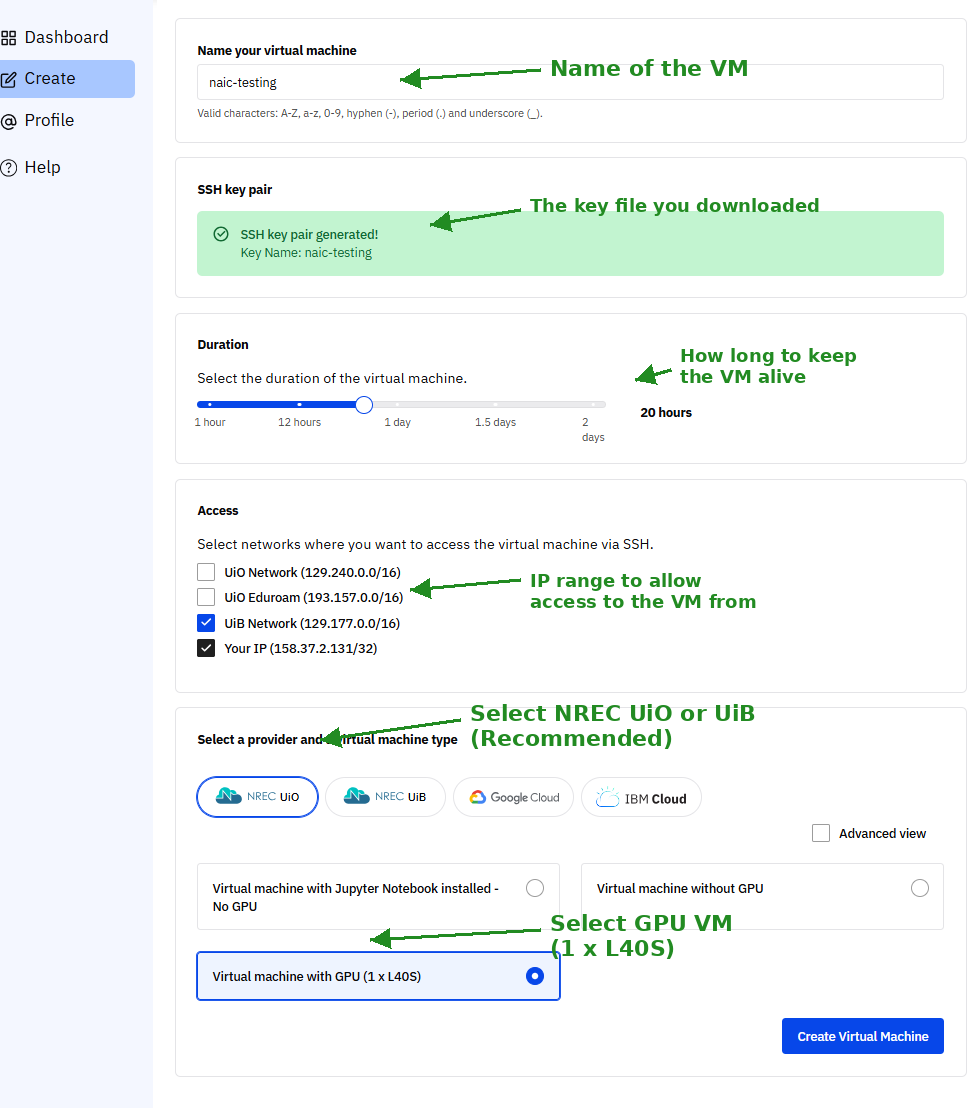
Step 4: Configure the VM
Fill in the remaining settings as shown in the annotated screenshot below:
Duration: Select how long to keep the VM alive (12-20 hours is typical for a workshop)
Access: Select your university network and/or “Your IP” to whitelist your connection
Provider: Select NREC UiO or NREC UiB (recommended)
VM type: Select “Virtual machine with GPU (1 x L40S)” for GPU-accelerated training
Warning
Provider selection: Use NREC UiO or NREC UiB only. The Google Cloud and IBM Cloud options are experimental and not stable — do not select them for this course.
Warning
IP Whitelisting: You can only SSH to the VM from the IP addresses you select in this step. If you later connect from a different network (e.g., home vs office, VPN, or mobile hotspot), you will be blocked. If this happens, log back into https://orchestrator.naic.no/ and add your new IP address.
Step 5: Wait for the provisioning to complete
Step 6: Access the customized help page to see how to login
Step 7: Login to the VM
chmod 600 /path/to/your-key.pem ssh -i /path/to/your-key.pem ubuntu@<VM_IP_ADDRESS>
Install Git for Windows which includes Git Bash, a terminal with built-in SSH and Unix commands.
Open Git Bash and run:
chmod 600 /c/Users/YourName/Downloads/your-key.pem
ssh -i /c/Users/YourName/Downloads/your-key.pem ubuntu@<VM_IP_ADDRESS>
Git Bash uses Unix-style paths: C:\Users\ becomes /c/Users/.
Windows 10/11 includes OpenSSH by default, but chmod is not available. Instead, fix key permissions via the file properties GUI or PowerShell:
Option A — File Properties (simplest):
Right-click your
.pemfile → Properties → Security → AdvancedClick “Disable inheritance” → “Remove all inherited permissions”
Click “Add” → “Select a principal” → type your Windows username → OK
Grant “Full control” → OK → Apply
Option B — PowerShell (icacls):
# Remove inherited permissions and grant only your user access
icacls "C:\Users\YourName\Downloads\your-key.pem" /inheritance:r /grant:r "%USERNAME%:R"
Then connect:
ssh -i "C:\Users\YourName\Downloads\your-key.pem" ubuntu@<VM_IP_ADDRESS>
If you have WSL installed, open your WSL terminal:
# Copy the key into WSL filesystem (Windows filesystem has permission issues)
cp /mnt/c/Users/YourName/Downloads/your-key.pem ~/your-key.pem
chmod 600 ~/your-key.pem
ssh -i ~/your-key.pem ubuntu@<VM_IP_ADDRESS>
Important: Always copy the key into the Linux filesystem (~/) rather than using it directly from /mnt/c/. Windows filesystem permissions are not enforced correctly under WSL.
Tip
Which option for Windows? Git Bash is the simplest — it gives you a Unix-like terminal with SSH, chmod, and scp built in. WSL is more powerful but requires separate installation. PowerShell works but key permissions are harder to manage.
Keypoints
MyAccessID via Feide is required for Orchestrator access
Download and secure your SSH key immediately after creation
Select NREC UiO or NREC UiB as provider — do not use Google Cloud or IBM Cloud
Select “Virtual machine with GPU (1 x L40S)” for GPU-accelerated training
Your IP must be whitelisted — if you change networks, add your new IP in the orchestrator
On Windows, use Git Bash (recommended), WSL, or PowerShell with icacls for key permissions